|
|
 |
Cum sa setezi DC++
Descarca aplicatia DC++
Ruleaza (dublu click) fisierul, alege optiunile de instalare ca cele din figura alaturata, si apoi continua instalarea sa apasand in fiecare fereastra, pe rand, Next, Install si apoi Close.
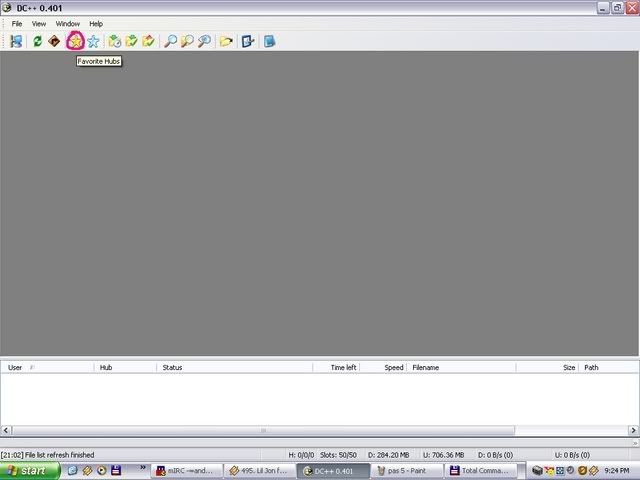
In meniul Start » Programs a aparut DC++. Porneste-l.
General
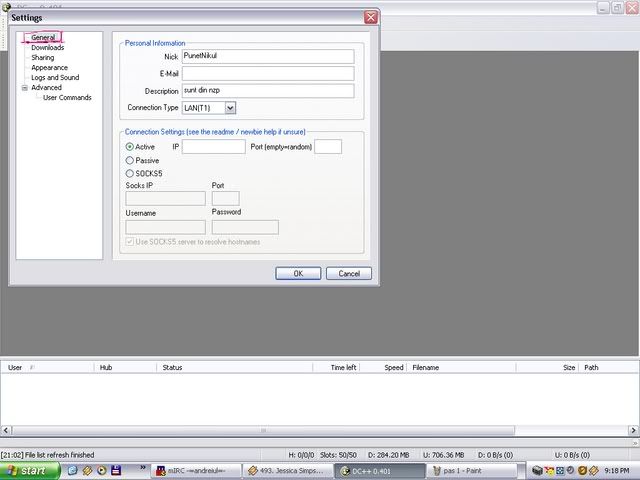
Dupa ce ai pornit programul DC++, din meniul de sus alege File »> Settings.
Apare o fereastra ca cea alaturata, fiind deja selectata optiunea General (panoul din stanga).
In campul Nick scrie numele cu care te conectezi la hub. Spre exemplu [Obcini][S-Net]nickname. Pentru mai multe detalii despre formula nickname-ului, click aici.
Campurile E-mail, Description si Connection type sunt optionale, dar ele vor fi vizibile de catre ceilalti.
Alege optiunea Active, iar in campul IP scrie adresa ta de IP, iar in cimpul Port scrie 1412.
Downloads
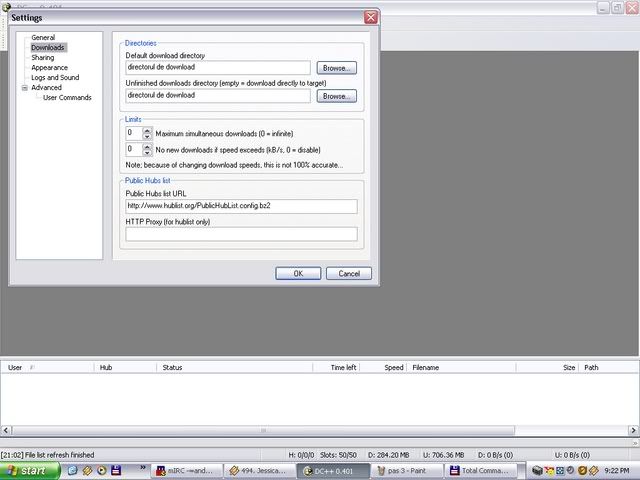
Din stanga alege Downloads.
In campul Default download directory alege cu Browse un folder in care vor fi plasate fisierele care s-au terminat de descarcat. Se recomanda sa folosesti un folder de pe o partitie unde este destul spatiu de stocare.
In campul Unfinished download directory alege cu Browse un folder in care vor fi plasate fisierele in curs de descarcare si neterminate; atunci cand fisierele sunt descarcate complet, ele vor fi automat mutate in folderul ales in Default download directory. E recomandat sa alegi un folder pe aceeasi partitie cu folderul pentru fisiere finale, pentru a evita defragmentarea sau solicitarea inutila a hard-discurilor.
La Maximum simultaneous downloads alege un numar rezonabil de download-uri pe care le poti efectua simultan. Recomandat intre 3 si 10.
Sharing
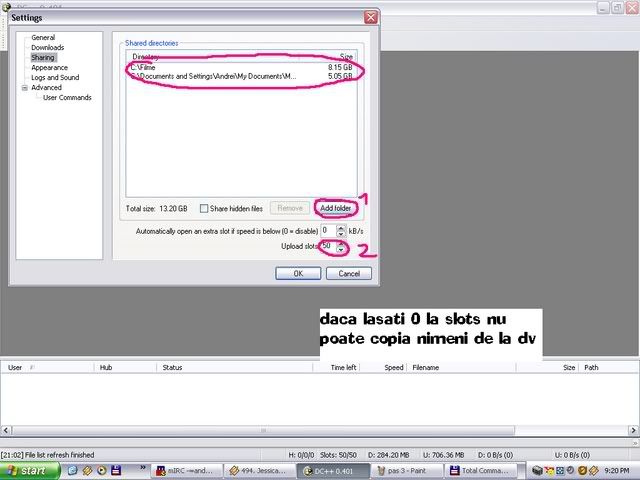
Din stanga alege Sharing.
Cu butonul Add folder adauga folderele pe care vrei sa le pui in share pentru ceilalti utilizatori. Pa masura ce adaugi foldere, dimensiunea share-ului este indicata in cimpul Total size; aceasta trebuie sa fie de cel putin 5 GB pentru a putea intra pe hub-ul Smart Net.
Inainte de a adauga foldere in share, citeste regulile hub-ului Smart Net aici.
NU bifa Share hidden files.
In campul Upload slots alege numarul de utilizatori care pot descarca simultan de la tine, care trebuie sa fie cel putin 4 pentru a putea intra pe hub.
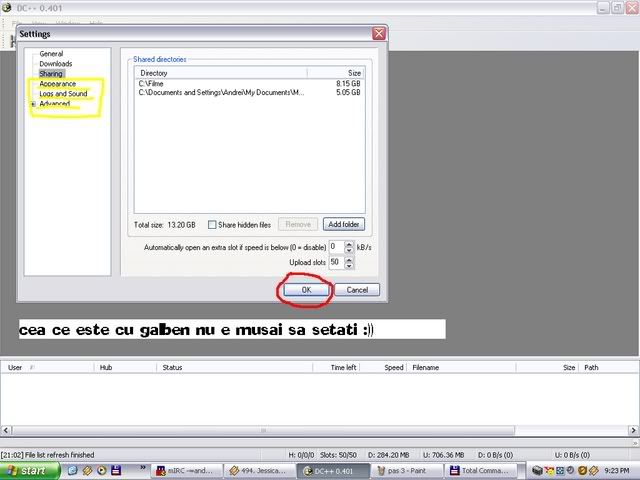
AdvancedDin stanga alege Advanced.
Daca nu te descurci cu aceste optiuni, le poti lasa neschimbate, ele nu vor afecta vizibil interactiunea ta cu aplicatia si reteaua. Pe masura ce devii experimentat in DC++, poti reveni aici si modifica optiunile.
Acum poti apasa butonul OK.
Conectare la hub
In programul DC++, din meniul View, alege Favorite Hubs.
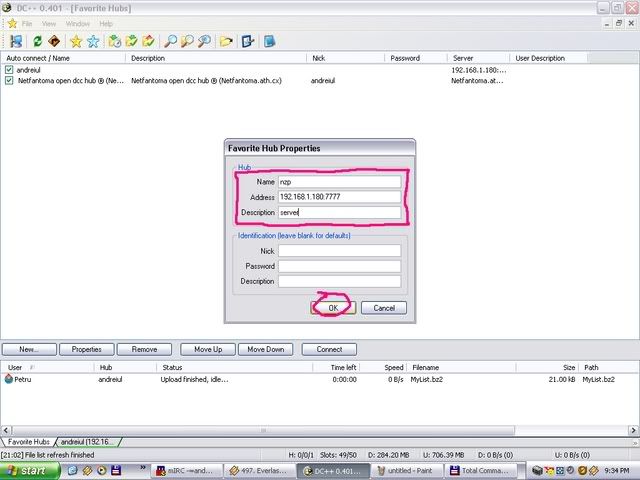
In noua fereastra apasa butonul New, ca in figura alaturata.
Detalii Hub
In campul Name scrie numele sub care vrei sa cunosti hubul nostru (de ex. SmartNet).
In campul Address trebuie sa scrii hub.s-net.ro, care este adresa hubului.
In campul Description, daca vrei, poti scrie o scurta descriere a hubului, la alegerea ta, pentru o identificare ulterioara sau catalogare mai usoara.
In campul Nick trebuie sa scrii nick-ul sub care vrei sa te conectezi pe acest hub. Citeste mai multe despre nick aici.
In campul Password, doar in cazul in care esti utilizator inregistrat, scrii parola. Altfel, nu este necesar.
Campul Description este optional, fiind pentru o descriere a contului.
Apasa butonul OK.
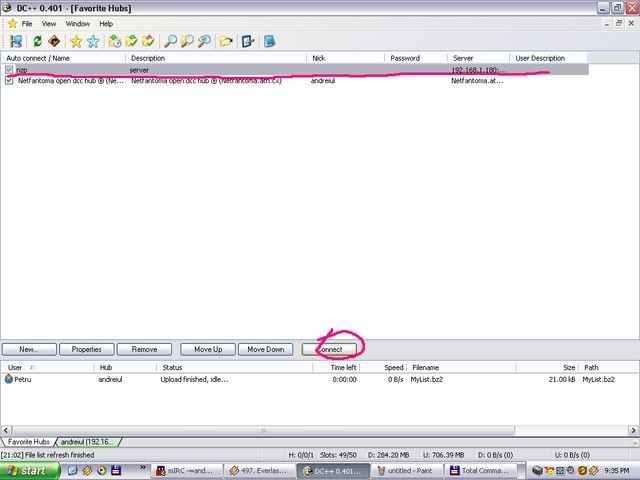
Apare un rand cu datele introduse mai inainte.
La inceputul randului este un mic patrat; bifeaza-l cu un click pe el; in acest fel, atunci cand pornesti DC++ te vei conecta automat pe hub.
Apasa butonul Connect pentru a te conecta acum la hub.
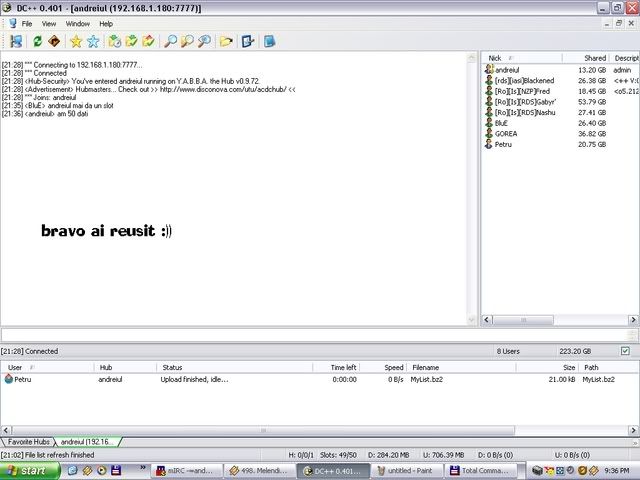
Asta a fost tot, succes!
Cum instalezi Windows XP prin USB folosing un Memory Stick

Please note this tutorial works on all computers.
To complete this tutorial you need a 32bit version of Windows XP or Windows Vista installed on your home PC.
What you'll need:
"Install WinXP From USB"
http://rapidshare.com/files/151783149/Install_WinXP_From_USB.rar
and extract at some folder.
Special Note: If you use the program Nlite be sure to keep the manual installation files as the USB_prep8 script relies on these files.
Extract the files in Bootsect.zip
The next step is to extract USB_prep8 and PeToUSB.
Next copy the PeToUSB executable into the USB_prep8 folder.
Inside of the USB_prep8 folder double click the executable named usb_prep8.cmd.
The window that opens will look like this:

Press any key to continue
You next window will look like this:

These settings are preconfigured for you all you need to do now is click start.
Once the format is complete DO NOT close the window just leave everything as it is and open a command prompt from your start menu (type cmd in the search bar or run box depending on your version of windows.).
Inside of the command windows go to the directory you have bootsect.exe saved.
(use the cd directoryname command to switch folders)
Now type "bootsect.exe /nt52 R:" NOTE R: is the drive letter for my USB stick if yours is different you need to change it accordingly. What this part does is write the correct boot sector to your USB stick, this allows your PC to boot from the USB stick without it nothing works.
Please note: When running the bootsect.exe command you cannot have any windows open displaying the content of your USB stick, if you have a window open bootsect.exe will be unable to lock the drive and write the bootsector correctly.
If all went well you should see "Bootcode was successfully updated on all targeted volumes."
Now you can close this command prompt (don't close the usbprep8 one by mistake) and the petousb window.
You window you see now should look like this:

If it doesn't try pressing enter.
Now you need to enter the correct information for numbers 1-3.
Press 1 and then enter. A folder browse window will open for you to browse to the location of you XP setup files (aka your cdrom drive with xp cd in)
Press 2 and enter a letter not currently assigned to a drive on your PC
Press 3 and enter the drive letter of your USB stick
Press 4 to start the process.
The script will ask you if its ok to format drive T:. This is just a temp drive the program creates to cache the windows installation files. Press Y then enter.
Once it's done formating press enter to continue again, you can now see the program copying files to the temp drive it created. Once this is done press enter to continue again.
Next you will see a box pop up asking you to copy the files to USB drive yes/no you want to click yes.
Once the script has completed copy files a popup window asking if you would like to USB drive to be preferred boot drive U: select YES on this window.
Now select yes to unmount the virtual drive.
Ok we are done the hard part, close the usbprep8 window.
Now make sure your pc is configured with USB as the primary boot device.
Insert your USB drive and boot up.
On the startup menu you have two options, select option number 2 for text mode setup.
From this point on it is just like any other windows XP installation delete/recreate the primary partition on your pc and format it using NTFS. Make sure you delete ALL partitions and recreate a single partition or you will get the hal.dll error message.
Once the text mode portion of setup is complete it will boot into the GUI mode (you can press enter after the reboot if your too excited to wait the 30 seconds)
Once the GUI portion of setup is complete you will again have to boot into GUI mode this will complete the XP installation and you will end up at you XP desktop. It is very important that you DO NOT REMOVE THE USB STICK before this point. Once you can see your start menu it is safe to remove the usb stick and reboot your pc to make sure everything worked.
This method has advantages over all current no cdrom methods of installing XP to the pc You do not have to copy setup files in DOS to the SSD and install from there. It gives you access to the recovery console by booting into text mode setup, and it gives you the ability to run repair installations of XP if you have problems later on.
um sa blochezi accesul la un folder
Ascunderea fisierelor si folosirea de software pentru blocarea anumitor foldere incepe sa fie depasita....mai ales ca dupa toate astea trebuie sa iti amintesti si parola de deblocare.
Folosind un truc simplu,poti bloca si debloca foldere fara a mai folosi softuri speciale pentru acest lucru.Pasii sunt urmatorii:
1)in Desktop fa un nou folder numit "folder"(sau ma rog,orice nume doresti)
2)apoi deschide Notepad-ul si lipeste urmatoarea secventa:
ren folder
folder.{21EC2020-3AEA-1069-A2DD-08002B30309D} |
3)salveaza fisierul ca "lock.bat"(aici .bat vine de la batch).Acest fisier va bloca folderul anterior creat
4)Deschide din nou Notepad-ul si lipeste aceasta secventa:
ren
folder.{21EC2020-3AEA-1069-A2DD-08002B30309D}
folder |
5)salveaza fisierul ca "key.bat".Acest fisier va debloca folderul de mai sus
4)acum da dublu click pe lock.bat pentru a bloca folderul.daca vei vrea sa deschizi folderul ,panoul de control il va deschide(schimbarea va aparea si in icoana folderului)
5)apoi da dublu click pe key.bat ca sa poti deschide folderul;acum daca vei vrea sa-l deschizi,vei putea accesa fisiere din el direct
6)blocheaza folderul si ascunde key.bat undeva pe hard disk
Blocheaza si deblocheaza un site din Windows
Blocheaza un website:
Sa zicem ca vrei sa blochezi accesul la site-ul www.site.com;pasii sunt urmatorii:
-intra in C:WINDOWSsystem32driversetc
-cauta fisierul numit HOSTS si deschide-l cu Notepad(click dreapta>Open with>Notepad)
-sub linia 127.0.0.1 localhost adauga o noua linie in care scrii : 127.0.0.2 www.site.com
-salveaza si inchide fisierul
Deblocheaza un website:
-elimina linia(liniile) adaugate in fisierul HOSTS(uneori e necesar un restart pentru a putea intra pe site)
|
|
 |
|
|
|
|


